Yes, I know it’s a terrible pun but I couldn’t resist it.
Quite seriously, though, how best to capture my favourite flying friends successfully on pixels, even when they are stationary, wasn’t immediately obvious so I thought it worth sharing a few opinions.
So, below are some hints and suggestions, and here’s a list of my kit.
Cameras
Most digital formats are capable of producing excellent results. However, I regard a viewfinder camera as being essential to locate your subject and to see what you’re getting. IMO compact cameras with only a rear screen are less than helpful for this kind of photography – sunlight reflecting off the rear screen makes life almost impossibly difficult. I still prefer a camera, either DSLR or mirrorless, with exchangeable lenses but I’ve seen some excellent results produced using the so-called bridge cameras.
Lenses
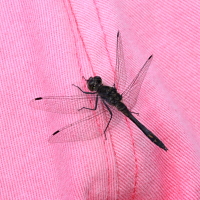
 I began with a “consumer” (i.e. not professional quality) lens, the Canon 70-300mm f4-5.6 zoom lens. Unsurprisingly, it was always used at the 300mm setting. At its closest focus distance of about 1.5m/5ft, it produced good images [see right] and proved that you can be successful without spending a fortune.
As a generally useful wildlife lens (birds as well as Odos), I now have the Canon 100-400mm f4.5-5.6 L IS mk II which has an MFD of 0.9m/3ft. It is a magnificent lens but at close to £2000, it darn well should be. I have also used the Canon EF 300mm f/4 L IS USM lens which is a little lighter and easy to control. It focuses to ~1.5m/5ft and produces a similar sized image. [The zoom lens suffers from the curiously named focus-breathing.] I often mounted the 1.4X extender (making an effective 420mm F5.6 lens), particularly for the smaller damselflies.
If you are stealthy enough and a willing subject allows you close enough, a macro lens is a good addition. Following some excellent results from Carol’s Canon 100mm f2.8 L IS macro lens (bought largely for plants), I added a Sigma 150mm EX macro to my armoury. I wanted the extra reach and this will take the 1.4X extender (the Canon 1.4X fits), making an effective 210mm macro lens. It produces excellent results but one still has to get quite close, risking scaring away the subject. I do know folks who only ever use a macro lens, though. Maybe I am particularly klutzy. 😉
More recently I tend to use the Olympus m4/3 format, which is a 2x crop factor and with the M.Zuiko 300mm prime lens is equivalent to a 600mm lens on a full frame camera. The glass is top quality but images can suffer from digital noise being a smaller sensor.
Camera Settings
ISO, Aperture & Depth of Field
Working close with telephoto lenses tends to produce a DoF about as thick as a cigarette paper. I know I want the background blurred but it would be nice to get the critter in focus. Enter: the main advantage of modern digital camera bodies – the ability to use higher ISO speeds successfully and, I might add, interchangeably.
In bright conditions ISO 400 works very well and I find 800 or 1600 acceptable for less bright conditions, though my APSC cropped sensor camera body (Canon EOS 7D mk I – when originally written) does tend to need a little noise reduction clean-up. Carol now uses a full-frame format Mirrorless (Canon EOS R) which is much better at noise performance, ISO 800 being fine and ISO 1600 perfectly acceptable. Such ISO ratings generally make f8 and f11 apertures very practical. That won’t get all four dragonfly wing tips in focus [nothing will] when shot from the side but it gives a fighting chance with the abdomen, thorax and eyes if you get reasonably perpendicular to your subject.
Metering
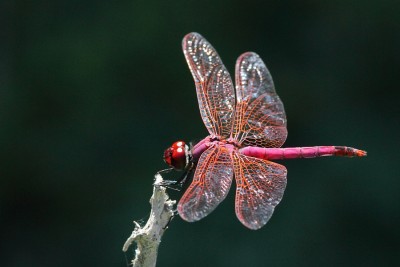
 Dragonflies and particularly Damselflies are fine [narrow] subjects and there can be a lot of frame around them. You want the critter correctly exposed whereas the background, especially when blurred, doesn’t really matter. I use what Canon calls “partial metering”, which is between 9% and 10% of the frame around the centre. This helps ensure that the background, which may be either very light or very dark, does not unduly affect the subject’s exposure. Here is a classic example – the almost black background would unduly affect the exposure, if taken into account.
Focusing
I favour auto-focusing. Many people prefer manual focusing when using a macro lens to pick precisely which point is the centre of focus. Modern cameras do not have the old aids to manual focusing, such as split image (align the two halves) or Fresnel lens (suddenly goes clear when in focus); they just have a plain screen and you are left to judge when focus is achieved (though sometimes a beep can be encouraged). Hence, I find auto-focus more reliable, especially with my corrected vision.
For static [well, mostly static – see later] subjects, I use a single auto-focus point, by default the centre point.
The other thing to note about auto-focusing is the auto-focusing method (using Canon terminology). For completely static subjects, landscapes for example, “one-shot” is generally used – the camera achieves focus and then locks it. The trouble with this for dragonflies is that either they or you move: they often sit on vegetation which moves in the breeze and/or you may move slightly on your feet, either forwards or backwards. For this reason I find “AI-Servo” (Called continuous focus by some) invaluable. AI-Servo is designed to track subjects approaching or receding from the camera and compensates for any wobble, either by me or by my subject. [See also the section about use of a monopod, below.]
Upgrading
Odos are small critters with very fine detail. The sharper the lens, the better. These days, any camera has enough mega-pixels to reproduce fine detail at A4 or A3 print size. Our older cameras were “only” 10 mega-pixels but they produced perfectly good A4 prints. Bolting a cheaper lens on a more expensive camera body won’t improve things whereas a sharper lens on a regular camera body will. Given “spare” cash burning a hole in your pocket, I would always recommend upgrading your lens before your camera body – you’ll get bigger bang for your buck, as our transatlantic friends say.
If you’ve already got the good glass, by all means upgrade the camera body as well. 😉
Getting Close

I don’t try to get as close as I’d like to be for the first click of the shutter. Since I am initially interested in identification, I start taking shots from further away. Then I’m free to attempt to shorten the distance and, if I do scare away a jumpy subject, all is not lost. This also helps to slow down my approach.
With a few id. shots in the bag, I can try and get something more artistic.
Identification Shots
A good picture for identification purposes is not the same as an artistic picture. Taking suitable pictures for identification purposes requires a knowledge of distinguishing features which may be visible from the top, from the side, or even from beneath. Until you’ve an idea of what the subject might be, that’s difficult. Enter one of JC’s rules of dragonfly photography:
You need to know what you’re photographing before taking a picture that proves what you’re photographing.
Fortunately with digital, you’re only burning up re-usable pixels so you can click away with gay abandon from various angles.
Appealing Shots
A couple of characteristics help to make a visually appealing Odo photograph. These include the reasonably obvious, usual good portrait practice of an uncluttered/blurred background. Working close to the subject with a long lens, the background is most likely blurred anyway but varying your line-up to get a cleaner background can help.

 Less obvious, perhaps, is your shooting angle. Shooting from a low angle to get on eye-level with your subject usually produces a more appealing result. This is true of wildlife photography in general. Here’s a couple of examples; both shots are Western Clubtails with uncluttered backgrounds but the eye-level shot has much more impact, IMHO.
Of course, not all locations allow for a low shooting angle but, when possible, it helps.
Stability
It is actually very difficult to maintain a single focus point over a narrow subject, like a damselfly, when just hand-holding. A tripod would be too cumbersome and slow to set up but I find a monopod to be manoeuvrable enough to be a practical solution. A monopod can be angles to get very low and works at all heights. I use one almost invariably (except, of course, for in-flight shots).
If you don’t want to carry a monopod, when standing bracing your left arm against your own body can help. For lower shots, try sitting and the elbows-on-raised-knees approach. To get lower still, go prone an lean on your elbows.
Carol prefers not to resort to a monopod – she seems to be able to hand-hold much more steadily than me. I’d like to suggest that’s because she drinks less alcohol but that would be untrue. 😀

Leave a Reply